Tuesday, June 18, 2013

Get Carried Away with Animal Antics

I have gotten carried away with Disney projects the last few months and it was nice to sit down and make a card again.  I decided to play some more with my cricut since I had a couple of cartridges I hadn’t opened yet.   I used my Imagine to make this card so that all I needed was a couple pieces of white cardstock. 
photo (28)
I layered different patterns of paper from the Spring Chic Imagine cartridge on my cardfront and then used some 3D foam pads to pop my rhino (from the Animal Antics cartridge) up from the background.  I love his chevron print glasses. 
I printed some more cardstock for the inside of the card and added my sentiment which is also from Animal Antics.
photo (29) 
That’s it a super quick and easy card.  Don’t get too carried away that you forget to do what you enjoy.
Supplies Used
cardstock
ATG tape
Cricut Imagine

Monday, June 10, 2013

Disney Album Project Life Style

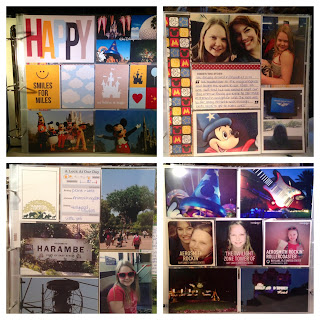
I'm slowly getting all my pictures from Disney World printed and it is taking forever.  We have 2 cameras and 3 iphones worth of pictures to go through.  I just about have the pages for our first day completed.  I'm using journaling cards and fillers from Project Mouse.  These cards are perfect for scrapping your Disney trip project life style.  We even printed a few and took them with us so we could fill them out while we were at Disney World.  You can purchase Project Mouse projects here.  This is just a little collage I made of a few of our pages.  The pictures aren't the best.  I need to experiment more with how to get the best shots of them in the page protectors. 


I'm using a variety of page protectors in the album.  One of my favorite new designs is from We R Memory Keepers and it has 4 6x4 horizontal photos and 3 4x4 slots in the middle perfect for instagram photos and I have a ton of those. 

Thursday, June 6, 2013

Photo Freedom

When I first got into paper crafting, I was a scrapbooker.  All I did was make scrapbook pages.  The more involved in the hobby I got, I started making cards also.  Once I started making cards, I didn’t stop.  They’re easy, they’re quick, and you need to have pictures developed to make them.  As my pictures sat and sat in my computer dying to get out, I realized I needed to start scrapbooking again.  I was nervous and afraid I wouldn’t remember how to make a scrapbook page and my pictures would be stuck in the computer forever.

Then I discovered project life or pocket scrapbooking.  It was exactly what I needed- a quick and easy way to get my pictures into an album.  There are several brands of products you can use in pocket scrapbooking.  For this project I am focusing on Echo Park’s version called Photo Freedom. 

Photo Freedom comes as a kit.  The kit contains photo sleeves in different designs, patterned paper that you can cut into 3x4 and 4x6 squares, and a sticker sheet.  Cutters Creek does not have Photo Freedom listed in the store currently, but Kim can order it for you.  The kit I used is called Today’s Story and the colors are great. 

photo (23)

photo (20)

This design of page protector has spaces for 4 x 6 items and 4 3x4 items.  You can use as many photos or fillers as you want.  You can also cut your photos smaller and use them in in the 3x5 slots, the possibilities are endless.  Each of the page elements is double sided giving you double the options. 

Here is a picture of what one of the pages looks like from the back with nothing additional added to it.

photo (22)

All I really need for this page is to add 2 more photos and it’s done.  So quick and easy and not stressful at all.  If you would like to give pocket scrapbooking a try, let Kim know so she can order you some supplies and you can get started.