Tuesday, December 3, 2013
The 12 Days of Christmas
Tuesday, November 19, 2013
It's Beginning to Look...
Wednesday, November 6, 2013
Giving Thanks
This time of year we all think about what thankful for. It's easy to be thankful for the big things like family, friends, and our health, but sometimes we forget about the simple things that make us happy every day. When I found this sentiment stamp from House Mouse it made me think about how thankful I am for simple things like having the time to craft.
Sunday, October 20, 2013
Trick or Treat
Tuesday, October 8, 2013
Think Pink.
Monday, October 7, 2013
More Filofax Fun


Monday, September 30, 2013
Filofax- my new love
I ordered my first filofax a pocket petal without much research (it's cute and it was on sale). Then, I realized it was probably going to be too small, so I tried to cancel the order and I couldn't. Before the pocket filofax even arrived, I ordered a personal size intending to send the pocket one back, but it's just too cute. I'll find a way to use it. Finally my personal size Domino filofax came and I began decorating it.
Foolishly I thought I would decorate my filofax with the supplies I already have. I mean I have washi tape and stickers I even have some post its hanging around. Every video I watched turned me on to a new product or site I had never heard of before. Not only do I need washi tape and stickers, I need magnetic bookmarks and special pens and really really cute post-its not the square ones from Staples (although Staples does have a lot of cute stuff I've been there 3 or 4 times in the last week and a half.)Here are a few of my fist purchases. I'm still waiting on a bunch of stuff to ship from overseas.

Monday, September 23, 2013
Getting organized with scrapbook supplies
Monday, September 16, 2013
EEEEEEEK
I used the My MInd’s Eye Mischievous paper pack. I love this paper because it’s Halloween paper, but it’s not too Halloweeny. I colored my adorable Magnolia image with my copic markers. I wanted the image to match the distressed look of the paper so I dulled down all the color by going over them with a pale warm grey or light tan color.
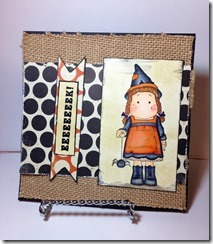
After I finished coloring the image, I went over the entire thing with some old paper distress ink then I edged it with some black soot distress ink. I went over some parts of the image with my copic spica pens, but it’s too hard to capture in the picture. For the sentiment I used some black Wow embossing glitter. The background of this card is some awesome burlap paper I found by DCWV. It’s burlap on the front and paper on the back (it’s the paper version of the mullet LOL
One thing I discovered while cleaning was that I had a problem with my 6 x 6 pads. I have them stored vertically in a little drawer. When I use a pad, I put all the scraps back inside the pad. I’ve found when I pull the pad out by the top, the scraps were falling out. I saw this idea on Youtube and it worked great. I put the scraps in a clear envelope and attach that to the back of the pad so the scraps and the full pieces are all together. In this case since the pad was pretty empty, I put the pad and the scraps down in the envelope. This has been working great.
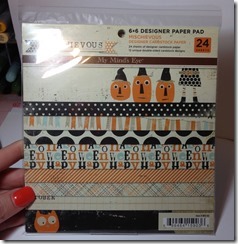
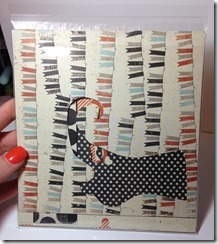
I hope you have enjoyed my Halloween card and that I have encouraged you to reconnect with some of your older supplies.
Cutters Creek Shopping List
Distress Ink
Copic Markers
Wow Embossing Glitter
My Mind’s Eye paper
Clear envelopes
Tuesday, August 27, 2013
Envelope Mini Album
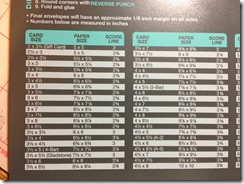
I cut my paper to 5 1/4 x 5 1/4 and made my envelopes. I will post a video explaining this in more detail below. I cut 8 envelopes. I stuck them together by sticking the flap of one envelope into another envelope and so on.

I cut some kraft cardstock and some patterned paper to add the pages of my book. This is a great project to use up some of your scraps of some of the 6x6 paper pads you’ve been stocking up on.
I used My Mind’s Eye paper and alternated between a chevron print and polka dots. Here is a look at the inside pages.
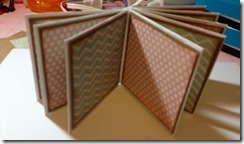
Here is a look at the book from the outside.

I know I’ve done a horrible job of explaining this, so here is a video that will hopefully make it easier for you to understand.
Monday, August 5, 2013
Cuddly Koala
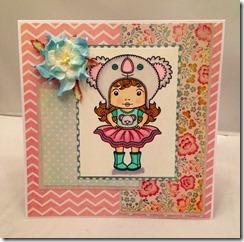
I have had this cute cuddly koala Marci stamp from La La Land Crafts for a while and I decided it was finally time to ink it up. Koalas were my favorite animal as a child and I think this image is adorable. I recently got a new 6 x 6 My Mind’s Eye pad from Kim and thought this image would go great with it. I love how soft the colors in this pad are. The pad is called lavender, but there’s actually no lavender it’s pinks, blues, and yellows.
I colored Marci with my copic markers to match the colors in the papers. I love chevron right now, so I had to make that the background. I picked a few more patterns to add and then finished the card off with one of my favorite Cutters Creek branded flowers.
Shopping List
Friday, July 12, 2013
Christmas in July Blog Hop
Welcome to the Cutters Creek Christmas in July Blog Hop! If you came from Fran’s blog you are in the right place, if not and you would like to start at the beginning please jump to the Cutters Creek Design Team blog.
We have some great projects in store for you today to provide you plenty of inspiration to help you jump start your holiday crafting. So grab your favorite beverage, sit back and relax, and get ready for some fun, inspiration, and the chance to win some blog candy too!
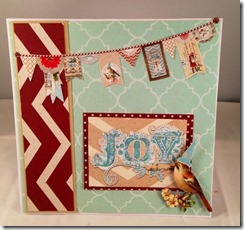
Here is what I made for you today. I used a paper pack from My Mind’s Eye. There paper is always full of such great patterns and I love mixing and matching them all. I did something different for this card and just used the elements of the paper instead of adding any outside stamped images or die cuts. Here is a picture of my card.
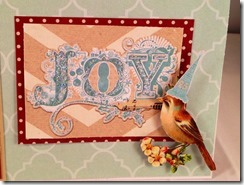
I used a couple of different patterns for the base of the card. I then cut the sentiment from another page of the pad and matted it with a coordinating pattern. After I glued that down, I cut some additional embellishments from the paper. I fussy cut around the little bird and pop dotted him up from the background I added a lot of stickles and spica pens to the elements to give them a little shine. Here is a close up of the sentiment and the bird.
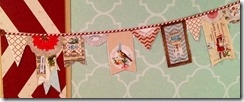
I wanted to add a little bit more so I fussy cut this little banner out from another one of the sheets.
It’s hard to tell from the picture, but the banner has some added bling as well.
I hope you have enjoyed all the projects this weekend, and don’t forget, we have some awesome blog candy for you.
To be eligible for the blog candy, we would love for you to follow us and leave a comment on all the blogs along the way. We will use Random.org to select a winner. The winner will be posted on the Cutters Creek Design Team blog on Monday July 15th.
Here is the complete blog hop line up in case you get lost along the way.
Design Team Blog: http://cutterscreekdesignteam.blogspot.com/
Kim: http://kreativekim.blogspot.com/
Deanna: http://deannaspapercrafts.blogspot.com/
Fran: http://scallopsandswirls.blogspot.com/
Mindy: http://www.scrappyandpiggy.blogspot.com/
Anne: http://www.annesscrapcorner.blogspot.com/
Cindy: http://www.cindyvernon.blogspot.com/
Jearise: http://lorbysworld.blogspot.com/
Michele: http://www.scrapytaz.blogspot.com/
Tuesday, June 18, 2013
Get Carried Away with Animal Antics
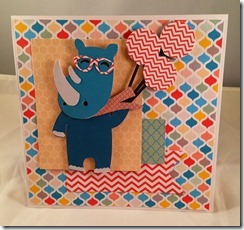
I layered different patterns of paper from the Spring Chic Imagine cartridge on my cardfront and then used some 3D foam pads to pop my rhino (from the Animal Antics cartridge) up from the background. I love his chevron print glasses.
I printed some more cardstock for the inside of the card and added my sentiment which is also from Animal Antics.
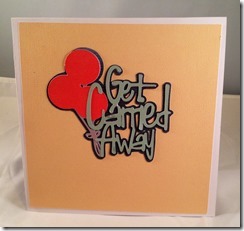
That’s it a super quick and easy card. Don’t get too carried away that you forget to do what you enjoy.
Supplies Used
cardstock
ATG tape
Cricut Imagine
Monday, June 10, 2013
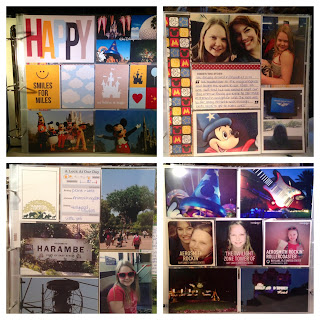
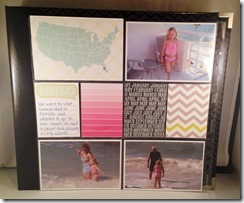
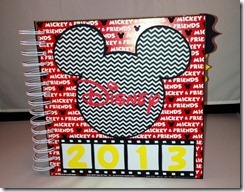
Disney Album Project Life Style

Thursday, June 6, 2013
Photo Freedom
When I first got into paper crafting, I was a scrapbooker. All I did was make scrapbook pages. The more involved in the hobby I got, I started making cards also. Once I started making cards, I didn’t stop. They’re easy, they’re quick, and you need to have pictures developed to make them. As my pictures sat and sat in my computer dying to get out, I realized I needed to start scrapbooking again. I was nervous and afraid I wouldn’t remember how to make a scrapbook page and my pictures would be stuck in the computer forever.
Then I discovered project life or pocket scrapbooking. It was exactly what I needed- a quick and easy way to get my pictures into an album. There are several brands of products you can use in pocket scrapbooking. For this project I am focusing on Echo Park’s version called Photo Freedom.
Photo Freedom comes as a kit. The kit contains photo sleeves in different designs, patterned paper that you can cut into 3x4 and 4x6 squares, and a sticker sheet. Cutters Creek does not have Photo Freedom listed in the store currently, but Kim can order it for you. The kit I used is called Today’s Story and the colors are great.
This design of page protector has spaces for 4 x 6 items and 4 3x4 items. You can use as many photos or fillers as you want. You can also cut your photos smaller and use them in in the 3x5 slots, the possibilities are endless. Each of the page elements is double sided giving you double the options.
Here is a picture of what one of the pages looks like from the back with nothing additional added to it.
All I really need for this page is to add 2 more photos and it’s done. So quick and easy and not stressful at all. If you would like to give pocket scrapbooking a try, let Kim know so she can order you some supplies and you can get started.
Sunday, May 5, 2013
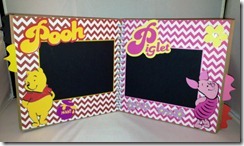
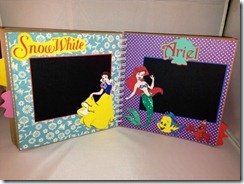
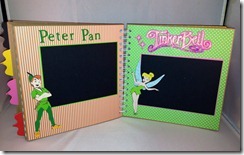
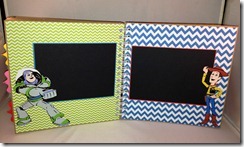
My Completed Disney Autograph Book
I leave for Disney World in 9 days and I can’t wait! I’ve been working on this autograph book for a couple of months now and it’s done (well 98% done) and bound. I used my cinch for this book, but a bind it all would have worked too. My book is 8x8 and I used chipboard for the cover. All my pages are built on kraft cardstock.
All the die cuts on the cover were cut with my cricut. I used the Mickey and Friends cartridge. I kept the same format for all the pages, an autograph block, the character’s name, and then the character themselves.
Here are a couple of the Winnie the Pooh pages I made using the Pooh and Friends cartridge.
These characters can be tedious to put together, so cut them as large as you can. Most of my characters are cut at 4.5 to 5 inches. This made them almost bearable to put together. I wish I could have cut them a little bit larger.
I used a lot of stickles on the princesses. Princesses need some bling. Also when your smaller pieces not cut really cleanly, you can cover up the imperfections with a little glitter.
The characters from the Disney Classics cartridge cut smaller than the others. I had to cut them at about 5.5 inches to get them to be the same size as the others.
These last 2 pages aren’t finished yet. I have to add their names. Buzz Lightyear was the hardest one to put together. Some of the pieces were just way too little and since I only have the digital version of this cartridge, I didn’t have a real manual to look at. I had to get creative with a silver marker and draw some parts in. Markers, paint pens, glitter pens, and stickles saved me on this project. The hardest parts to cut are the eyes, they are just way too small to mess with. I used a white pen and just colored them in with various glitter pens.
Even though this was a long and difficult project, I really loved making it. I know it will get put to good use and it brought me and cricut back together.
Cutterscreek Supplies Used
Tuesday, April 30, 2013
Make A Custom Smash Book
Smash Books are extremely popular lately and Cutters Creek has a great selection of books and products. The books are full of great designs, but sometimes they’re just not what you’re looking for. I’m taking a vacation to Disney World in a couple of weeks and I thought a smash book would be perfect for keeping memories and memorabilia from the trip. A Disney themed smash book does not exist (yet), so I decided to make my own. All you need for this project is a binding machine like a cinch or bind it all, some chipboard for your covers, cardstock, some smash supplies and embellishments.
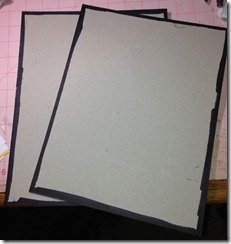
The first thing I did is to cover the edges of my raw chipboard covers with sharpie. This makes it look like I’m using black chipboard for the covers and hides any raw edges.
My covers are 8 1/2 by 11. After I had my edges inked up, I cut some paper for the cover. I cut my paper at 8 3/8 by 10 7/8 so I could center it in the middle of the cover and not worry about it hanging over the edge.
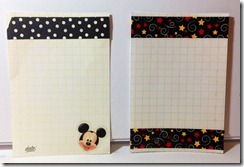
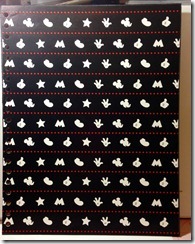 This is the outside of the front cover and this is the inside of the front cover
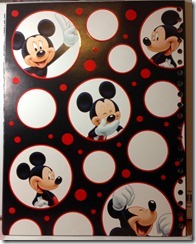
Next it was time to move on to my inside pages. The smash book pages are made of really nice strong cardstock. To recreate that feel, I covered some white cardstock with patterned paper.
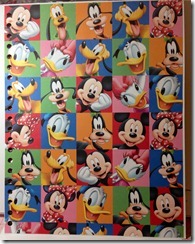 Some of the pages I covered completely with paper and some of them I layered with scraps leftover from another project.
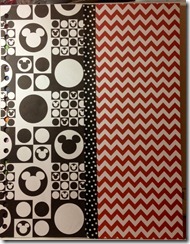 I had Kim special order me some awesome washi tape in different Disney patterns and I used a strip of that down the middle of this page.
Next step was to start on my smash supplies. Some of them will work as is, but some of them just don’t go with my color scheme. I found some 6x8 mailing envelopes and turned them into smash pockets. I took one of my smash pockets and laid it down on the envelope and traced the outline.
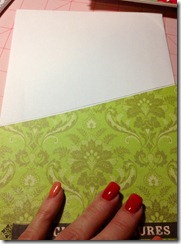 Then I layered it with patterned paper and more great washi tape and cut along the diagonal. Now I have a pocket that coordinates perfectly with my theme.
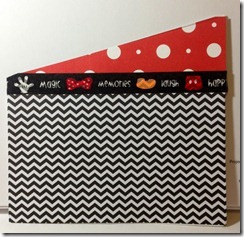 It’s perfect for holding daily schedules of maps of the park. The smash pads are perfect for jotting down notes and memories. There is no need to recreate the wheel on this. I dressed them up with some more washi tape and stickers to give them a Disney look.
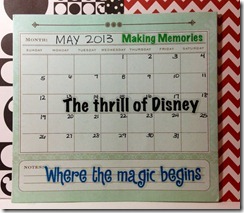
I also gave the little smash calendar pocket a Disney feel with you guessed it- more washi tape and stickers.
Just because a Smash Book doesn’t have the exact look and feel you need doesn’t mean you can’t make it your own. I only have 2 weeks, so I need to get to work!
Get your Smash supplies at Cutters Creek
Wednesday, April 10, 2013
Fun with Instagram
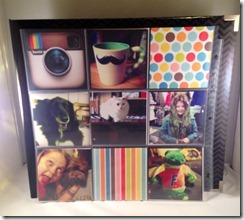
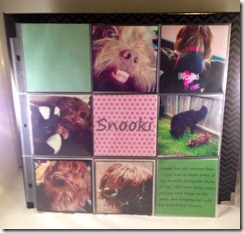
I admit I have a slight Instagram obsession I love playing with all the different filters and changing the look of my photos. I really never knew what to do with them until recently. I’m determined to try and get back to scrapbooking. I started as a scrapbooker and then I made some cards and I was hooked. I still take a lot of pictures with the intention of scrapping them, but very few photos ever get printed. I got an email the other day about printing instagram photos and I had to try it out. I love the pocket style page protectors by We R Memory Keepers and one of the styles in the pack holds 9 4x4 photos. This is the perfect size for Instagram prints. So, I gathered up a few of my favorites and made some layouts.
The page protector has 9 individual photo pockets and you just drop your prints in. It couldn’t be easier. For the layout on the left I added a few blocks of Echo Park paper to give it some pop. For the layout on the right I added some decorative paper and a journaling block. I love how easy this was and I’m hooked on this style of scrapbooking. I can’t wait to add some pictures to rest of the styles that come in the variety pack.
Cutters Creek Shopping List


 clip_image002[2](1)](http://lh3.ggpht.com/-Uq0GuEr1pCY/UeDJu8S_NOI/AAAAAAAADbg/cvrIWNXTNR4/clip_image002%25255B2%25255D%2525281%252529_thumb.jpg?imgmax=800)
